A couple of years ago, I stumbled on an idea that was so brilliant, it was almost unbelievable. Here at Red Gate Farm, we try to house and manage our animals as naturally as possible. That includes our horses. As is the case with most horse owners, we had the idea in our heads that the most “natural” way to manage our horses was by keeping them out on our beautiful pastures, and rotating the pastures regularly to simulate the way wild herds move. We were so excited to finally have such a beautiful pasture to keep our horses.
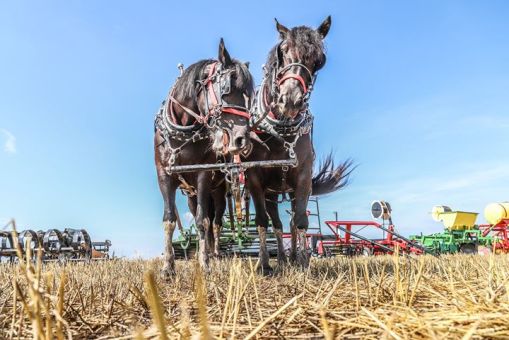
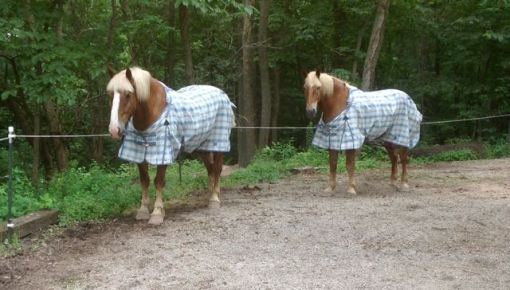
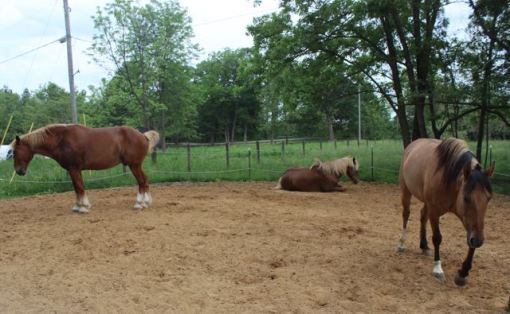
Within months of weaning them onto the pasture, the problems started. Fevers, abscesses, sole bruises, laminitis, hoof rings, thrush, and more. Within a year, my work horses were lame more than they were sound. We consulted with vets, farriers, draft experts, and draft owners. I read books, researched, and could not figure out the problem. At the experts’ advice, we fed expensive supplements and high-quality hay when not on pasture. We finally resorted to shoeing, just to keep the boys working–we are a horse-powered farm after all. Mind you, I have owned and/or trained horses for almost 20 years, with a few years off here or there. In those 20 years, I have housed horses in stalls, dry paddocks, stalls with runs, and almost every option available. I had never had a single issue of unexplained lameness, never an abscess, and never had to shoe a horse. For a while, I suspected it was an issue limited to draft genetics, but then, one day, our new mustang came up lame as well. She was as sound as any mustang I’d ever worked with, so this truly baffled me. Then, it occurred to me. In my previous years of owning horses, I had always lived in the desert, on sandy soils, or in the Rocky Mountain areas–none of which had lush, green grass. Usually, the horses lived in stalls or dirt paddocks, and the few times they had access to fresh pasture, it was thin, short, weedy, overgrazed, low-sugar, rough forages, common to many boarding stables around the country. I realized the biggest change in our horse management was the new, rich pasture. Furthermore, it occurred to us that the few places in our nation that do NOT have herds of wild horses include the central midwestern region or states with lush forages. Even the herds that live along the east coast live on sandy beaches and islands. We were convinced this was the culprit. We didn’t want to stall the horses, and I didn’t have a dirt paddock large enough to keep several horses. Thus, we quickly threw together an electric wire paddock on a portion of our gravel driveway to buy us some time. The photo shows the horses sporting their ridiculously pricey fly sheets, as one of the downsides of confining was that they could no longer escape the vicious and persistent horse flies here.
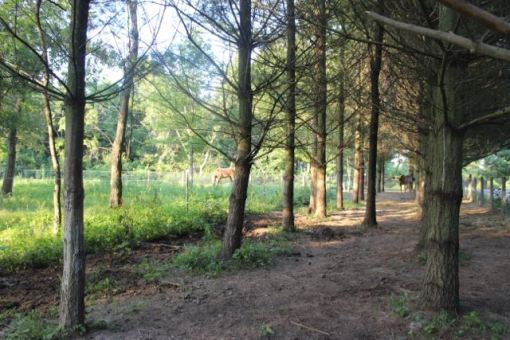
Meanwhile, I continued researching the best option for permanent housing. I stumbled upon a great study of wild horse herds, and the research resulted in a domestic-horse management concept called ” Paddock Paradise.” Essentially, it was designed by farrier and wild-horse expert Jamie Jackson to simulate the diet, eating habits, herd dynamics, and movements of the wild horses. First, the horses are removed from free-choice pasture, and put on a diet of low-sugar, high-roughage hay. Ideally, the sugar content is less than 10%. Then, rather than stalls, runs, or small paddocks, the horses are given a track to live on. Similar to a racetrack, the track is designed in such a way as to encourage movement and stimulation of the horse. Many build the track around the perimeter of their pasture, while some zig-zag or meander the track through their terrain. Most tracks are some form of continuous loop, but others dead end into a wide area and force the horses to turn around. Either way can work. Most of the track is narrow–about 10-15 foot wide. It may get a bit narrower in some areas, and wider in others, but for the most part, that standard width encourages forward movement.
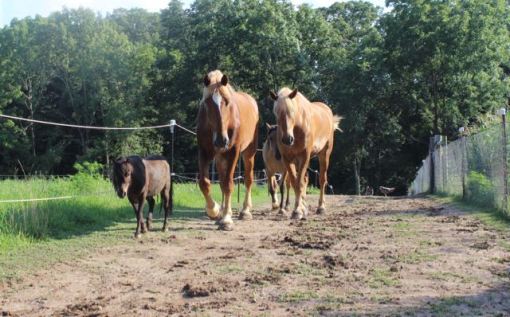
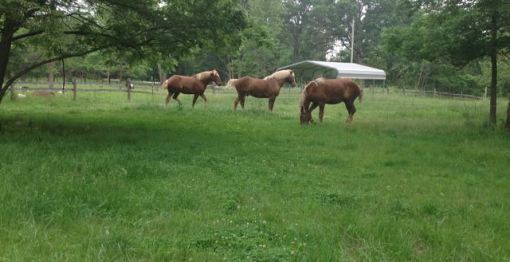
Our little herd traveling from their water station to one of the hay stations. This section of track is 15 feet wide–our standard for most of the track.
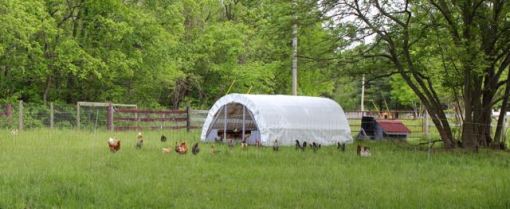
Then, “stations” are set up along the track. There is a water station, a hay station, a mineral station, and in the case of long tracks, there may be several of each. You can also get creative. There can be “stations” for rolling and lounging, obstacles, water crossings, different surfaces along the track, and more. The imagination is the limit, but the idea is to keep the horses moving to meet their needs–just like horses in the wild.
By using a high electric line, it still allows the horses to graze a little, but not enough to cause health troubles. One extra benefit….a nicely grazed strip means I never have to trim around my fence posts!
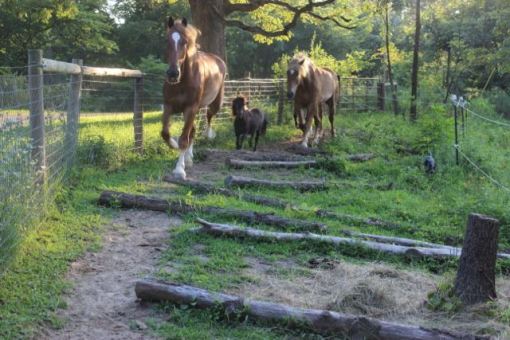
One of our”obstacle” sections, where the horses learn to pick up their feet to cross over the logs along this stretch of track.
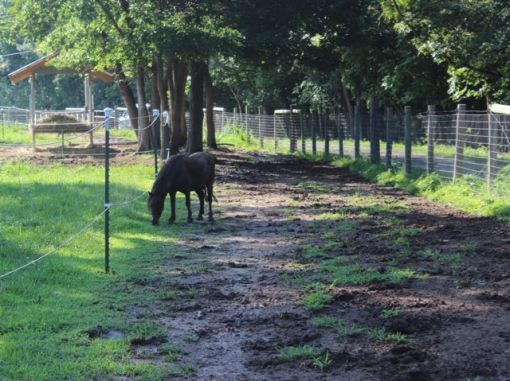
This area of track can be closed off to double as a round pen where I can train as desired. Otherwise it stays open with the track passing through, and the horses selected it as their favorite rest and rolling area. Notice there is no manure in this area, even though they have had access to it for over a year (we have NEVER cleaned the manure in that year!).
In our case, we eliminated the expensive supplements, switched to the low-sugar hay, eliminated the sugary grains (oats only for the working horses), and moved the horses into the track. The mysterious fevers and sudden bouts of lameness stopped immediately. Within 2 months, the hooves began looking different, and within 4 months, we were able to remove their shoes for standard farm work. With regular trims, the hoof flares began disappearing, the cracks began growing out, and the thrush and white line issues became almost non-existent. After a year, the only issue we really dealt with was occasional sole tenderness when we worked the horses on sharp gravel, which made sense considering most of their track was our wet clay soils (too much moisture results in softer soles and hooves).
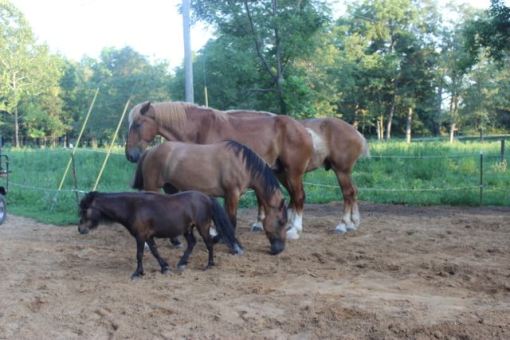
Other benefits we have seen include a change in herd dynamics. The “herd” traveled together along the track, established a predictable routine, designated bathroom areas (known as “stud piles” in the wild) for manuring, and our horse who NEVER laid down previously began laying down to rest on occasion.
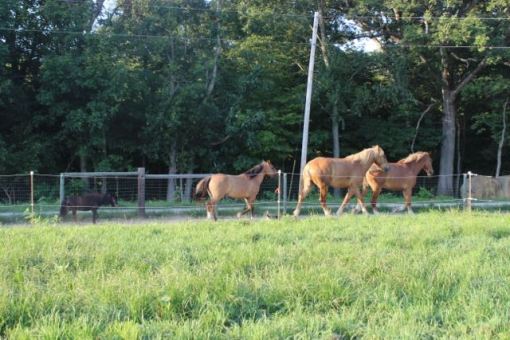
Moving as a herd along the track.
In the lower left corner, you can see one of the herd’s designated “stud piles” for manuring. This photo was taken over a year after putting the horses in this track, and we have NEVER cleaned the manure. Notice, however, that there is no manure anywhere else in the photo. The horses can be seen resting in the shade of the trees at the far end.
I had several concerns when we first opted to try it out. I was very concerned about one of our horses, Bud, losing condition. He was atypical of most drafts, in that he was a “high-maintenance” horse or “hard-keeper.” He required almost twice the grain and hay of the other drafts, and it seemed I was always fighting to get him to gain weight. When our work season really got busy, we had to increase his feed further, and he still looked a bit thin with ribs showing within a couple months. I wasn’t confident this new system would work well for him. Boy, was I wrong! As it turned out, I was always battling adding a fat layer to him. The increased movement caused him to muscle up, and improved his metabolism. That’s about the only way I can explain it. He has looked awesome every since, despite the fact his work load has more than doubled from that first year!
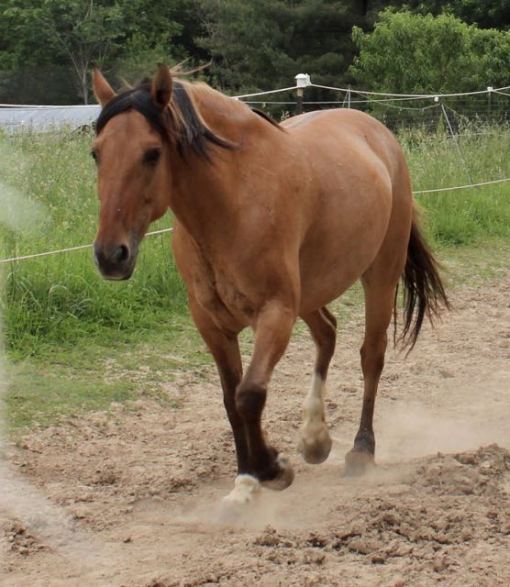
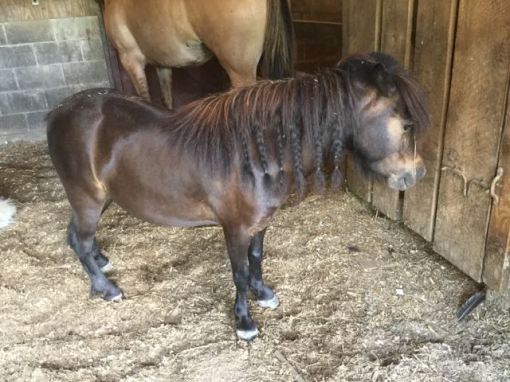
Physical condition is excellent to due to the increased movement. This mustang is a bit on the pudgy side, in fact, but her muscle development has given her a much broader body type compared to most domesticated mustangs.
Our first big “test” of the conditioning came the following spring. Every spring, we take the horses to an annual “plow day,” where teamsters from several states come together to enjoy plowing fields with their teams of horses. The downside of spring plowing is the plowing is one of the toughest jobs you can ask a horse to do physically, and this particular event tends to be right at the end of winter, when the horses are in their worst “winter” condition–otherwise known as fat and out of shape! That spring, however, was different for us. Due to personal circumstances, we had been unable to work the team at all for over 2 months. As usual, we saw teams needing breaks after just 1/2 hour, and stopping completely after about 2-3 hours of plowing. With just quick pauses to catch their breath, however, our team was still going strong after 4 hours, and hadn’t even broken a sweat! And for those who are familiar with horse-plowing, my team was pulling a 14-inch sulky plow, dropped about 8 inches in! I truly was surprised and even amazed at their condition.
GPS tracking studies have shown that horses living on tracks situated along the perimeter of averaged sized pastures (roughly 1-5 acres), can move significantly more than when housed on pasture. Of course, the longer the track, the more that can increase. Although horses can still be turned out into the pasture for periodic grazing, the time should be limited to no more than 30 minute periods of time, unless your pasture is very sparse or weedy. Lush pastures should be limited to about 15 minutes.
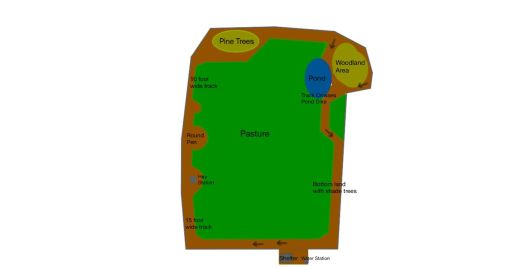
A sketch of our current Paddock Paradise track, which is situated along the perimeter of our 6 acre pasture. Since we no longer use the pasture for significant horse grazing, it is now used to produce small amounts of hay and to graze our grass-fed cattle and pasture-based poultry.
A few other benefits of track housing is that horses do not get bored, and thus do not develop boredom-related behavioral issues such as cribbing, pawing, pacing, and general crankiness. I do not have to “lunge” or “get the spunk out” of my horses before riding, as they are already exercised and ready to go, both mentally and physically.
So, with all the good that comes from a system like this, could there be a negative side to it? The answer is “Yes,” though I have only found one downside. When horses are allowed to live in a herd setting, with increased movement and natural environments, injuries are bound to happen. Scrapes, dings, nicks, lumps, bumps, bite marks, and chewed-on hair have become quite normal for our horses. Think of it like children….you can keep them confined all day and protect them from injury, or you can let them out to play at the risk of scraped knees and elbows. Same principle applies here. It isn’t terribly unsightly, but it is a fact that might not go over well in a show-barn. However, in our case, the mental and physical benefits we have observed in our horses make every little scar totally worthwhile.

Some lumps, bumps, and dings one of our team showed up to breakfast with one morning.
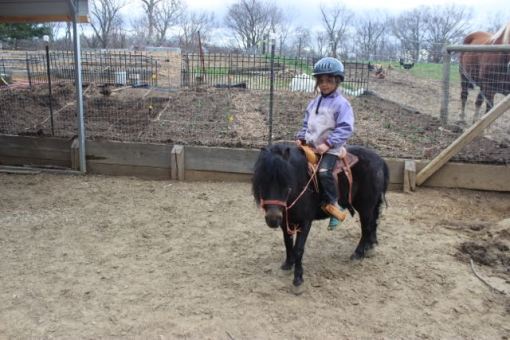
Now that we have used our Paddock Paradise for over a year, we hope to never have to return to any other way of managing horses! I cannot express to you all the incredible benefits we have seen. Our Amish friends, whose livelihood depends on their horses, have watched as our horses have changed over time, and they are even considering trying it now. If you have your own property, I highly encourage you to consider using this system. If, however, you are stuck at a boarding stable, I encourage you to talk to the stable manager. Show them this post. I also wrote an article about it that was published in “Rural Heritage” magazine. Boarding stables around the world have found success with this system. It just works. We purchased an “easy-keeping” little mini horse at one point who formerly ate about 1/8 flake of hay a day while house in a dray paddock, and was still roly-poly fat! We put him on track, and despite having free-choice access to hay 24/7, he lost the weight and muscled up, thanks to the increased movement! If you have easy-keeping ponies, hard-keeper horses, geriatric horses, rescues needing rehab, you name it…..you may have to modify slightly to begin with, but ultimately, I’d be willing to bet they would thrive on this system! There are just too many personal testimonies out there to suggest otherwise.
We are actually in the process of building our 2nd Paddock Paradise now. We are moving the track to our back acreage, so we can increase the length and the things they are exposed to. Our new track will be longer, have water crossings, steep hills, long stretches for galloping, more hard surfaces (and less clay), and more! We hope to move the horses in before the end of the year. It requires a good bit of land clearing, which is taking time, but we are making progress. There you have it!